This is a guide for me to follow while doing a live tutorial for my fellow jupyter notebook/lab users at ICFO. I'm mainly doing this guide to get familiar with nbdev and, hopefully, don't look at it during the tutorial.
Getting started
The first thing to do is to actually install nbdev via pip install nbdev. At some point we will also need fastcore that can be installed in the same way pip install fastcore.
Quickly set a GitHub account if there is not any.
Set up a repo in GitHub
Repo from template
The easiest way to get started is to start a repo from the nbdev template in GitHub. This link only works if loged into GitHub and can be found in the original tutorial.
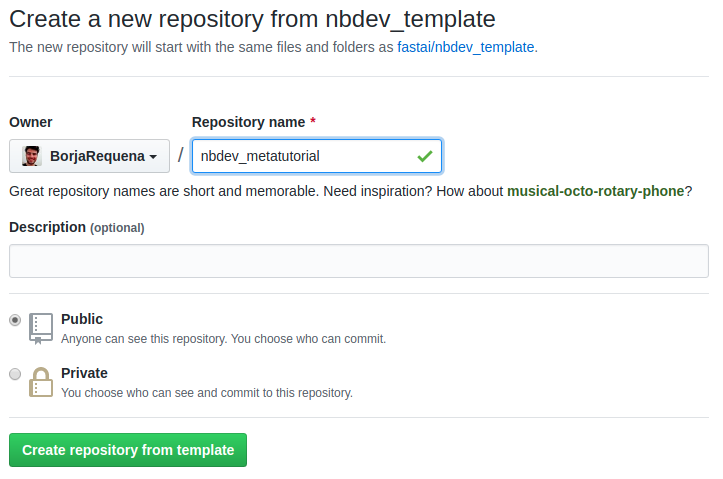
We can name the repo whatever we want. It does not matter at all so feel free to be creative!
Edit settings.ini
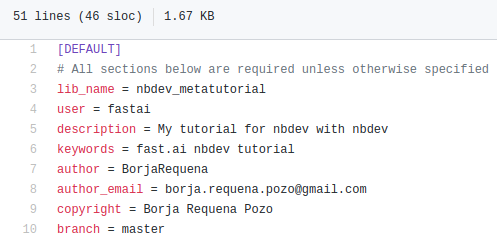
Edit the file directly in GitHub: uncomment and fill the first mandatory fields. It is important that lib_name is the same as the repo to prevent problems afterwards with the docs.
Commit the changes with whatever message you feel like providing to yourself or the future collaborators of the repo.
GitHub Pages
With GitHub pages we can have our automatically-generated documentation by nbdev hosted in a free server based on jekyll.
It is interesting to mention the jekyll installation, as it takes a while.
Hooks
The last step before getting hands on is to install the git hooks. Within the repo directory, run nbdev_install_git_hooks in the terminal. This will strip the notebooks from a lot of metadata that generally causes commit conflicts out of nowhere.
Nonetheless, if we ever get a conflict, we can also run nbdev_fix_merge filename.ipynb and it will do some fixing. If the conflict still remains, it will generate a merged file with all the cells with highlighted conflicts as in any other document.
Our package
Let's start with the code editing.
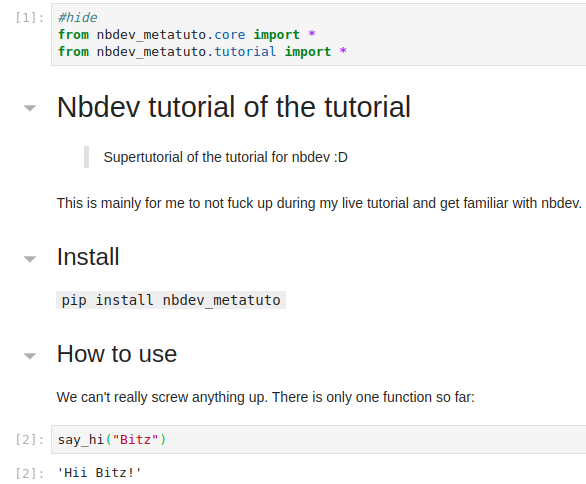
Open a jupyter notebook/lab and open 00_core.ipynb. The core is the name of the package that will be lib_name.core and set with # default_exp core (names need to be consistent). The number is completely optional although recommended.
There are a few comands or special coments that will tell nbdev what to include where:
- In the first cell
# default_exp module_nametells nbdev to export the notebook aslib_name.module_name.py #hideprevents the cell from appearing in the documentation and excludes it from the module#exportincludes the cell in the exported package and the documentation#exportsincludes the cell in the package and the source code in the documentation (s stands for source)- Not putting anything will only include the cell in the documentations
These comments need to be always in the first line of the cell.
Edits on 00_core.ipynb
Start by changing the module name and writing down a description. Try to be creative.
Then, proceed to define a function
#export
def say_hi(to):
    "Enthusiastically say hi to someone"
    return f'Hii {to}!'
Since I put #export also in the tutorial, we can see the function documentation right below.
Feel free to add a markdown description too. The string in the source code becomes function descrption in the documentation, as you can see right above.
We can also add tests. It is always good to have them in the documentations as they show new users what behavior they should expect. For that we will need to import fastcore. Since we don't want it to be included in the docs, we can just either put it in the previous cell with
#hide
from nbdev.showdoc import *
to hide both imports, or we can just make a whole new cell with #hide. To test the function, we can write:
#hide
from fastcore.test import *
test_eq(say_hi("Bitz"), "Hii Bitz!")
In this notebook's source code we can find both cells: one with #hide and the other one with the test. Provided that no command is written for the test cell, it is included in this documentation (right below) but not in the package.
test_eq(say_hi("Bitz"),"Hii Bitz!")
This can also be done with assert (notice that this time I didn't embed the code in the markdown and what we see now is the exported cell)
assert say_hi("Gorka") == "Hii Gorka!"
Build the library
We can now proceed to build the python module with nbdev. In the terminal, go to our project folder and run nbdev_build_lib. For this tutorial, we now have a new nbdev_metatuto folder where we can find tutorial.py and core.py.
$ nbdev_build_lib
Converted 00_tutorial.ipynb.
Converted 01_core.ipynb.
Converted index.ipynb.
Basically, the project becomes a python package and each notebook is a module.
Index
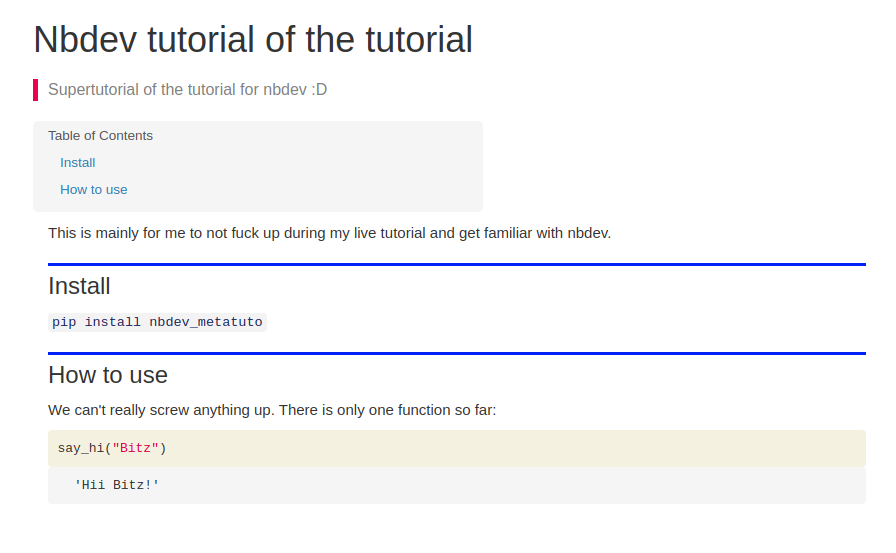
index.ipynb will be the source for the documentation home page and the project readme.
We need to change the first cell to import our library. Change the name of the library to yours, e.g., nbdev_metatuto.core and nbdev_metatuto.tutorial in my case. Write down a brief description and provide a function example to ensure that it works.
It is also extremely useful to use %autoreload to avoid resetting the kernel every time we change the package.
%load_ext autoreload
%autoreload 2
Build the docs
We are now ready to build the documentation. In the terminal, go to the project folder and run nbdev_build_docs
$ nbdev_build_docs
converting: /home/brequena/GitHub/nbdev_metatutorial/00_tutorial.ipynb
converting: /home/brequena/GitHub/nbdev_metatutorial/index.ipynb
converting: /home/brequena/GitHub/nbdev_metatutorial/01_core.ipynb
converting /home/brequena/GitHub/nbdev_metatutorial/index.ipynb to README.md
docs/images/
If we go to the docs directory, we can see now the files core.html, index.html, tutorial.html for this tutorial.
Commit to GitHub
Commit! We can see all the changes with git status. To proceed run git add -A, commit with git commit -am 'commit message' and poooosh! git push.
Notice that the __init__.py is created automatically by default, but we can edit it freely. For example, if we add the line
from .core import *
we can then just import the library without specifying the core in our index.
Continuous integration (CI)
Github will check that everything is okey. Edit .github/workflows/main.yml if you don't like it (I never tried).
Go to the commits and see whether we had any issue building the docs. Spoiler alert we did. We always do. Click the cross to see what went wrong.
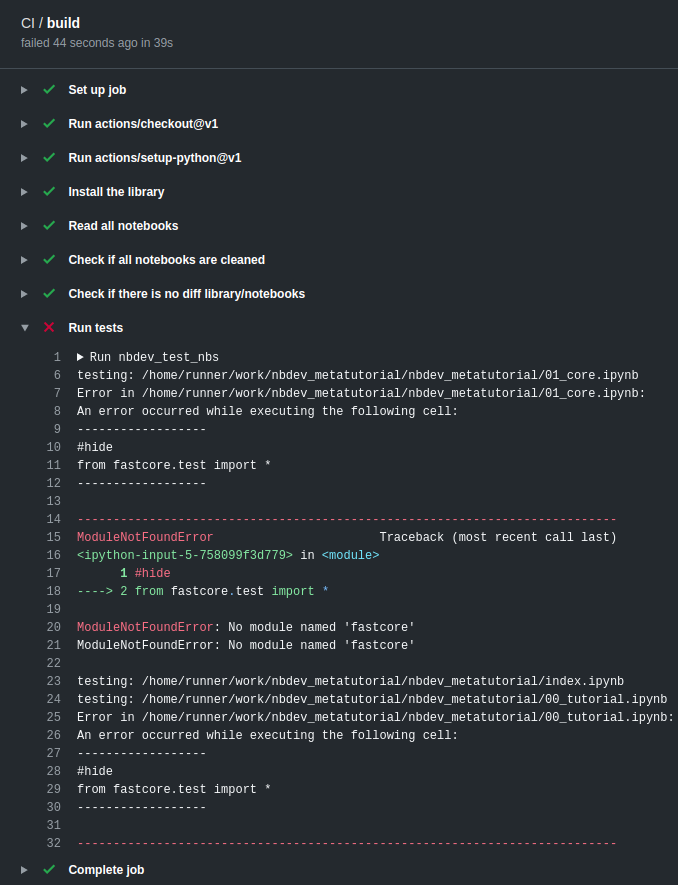
The problem is that we did not specify the dependencies of our library in settings.ini. Add the library names with space separations:
# Optional. Same format as setuptools requirements
requirements = fastcore
# Optional. Same format as setuptools console_scripts
# console_scripts =
Commit and push again!
GREAT!
Classes
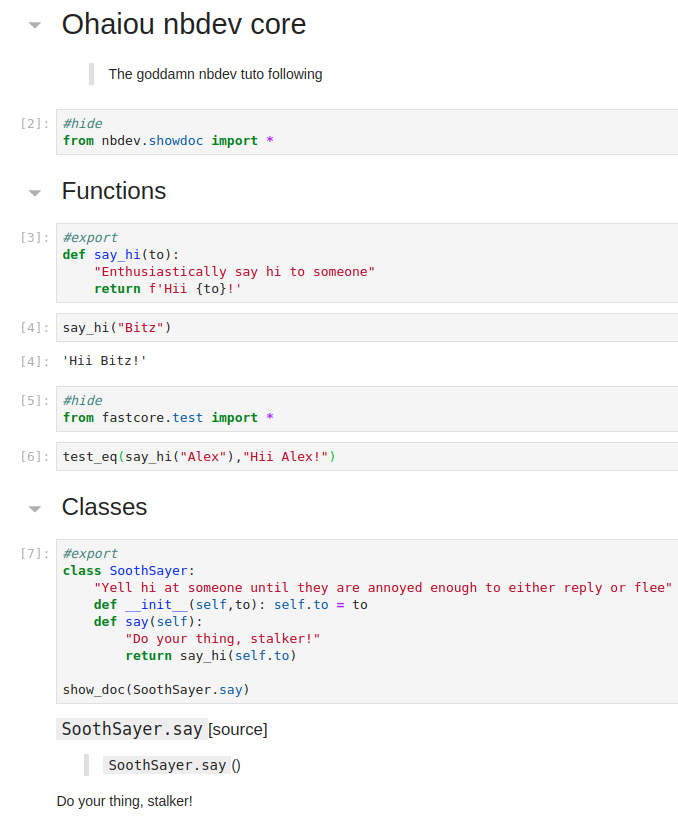
Add a class to 00_core.ipynb like:
class SoothSayer:
    "Yell hi at someone until they are annoyed enough to either reply or flee"
    def __init__(self,to): self.to = to
    def say(self): return say_hi(self.to)
Notice that this time we can see the source code and the class documentation because I included #exports. However, the method documentation does not appear for classes unless we explicitly indicate it with show_doc() from nbdev.showdoc (already imported).
It would be nice to include a docstring better just as follows:
class SoothSayer:
    "Yell hi at someone until they are annoyed enough to either reply or flee"
    def __init__(self,to): self.to = to
    def say(self):
        "Do your thing, stalker!"
        return say_hi(self.to)
It is always a good idea to put titles and sections that will make the library more readable.
Also, remember to provide examples and tests of the classes and their methods.
sayer = SoothSayer("Maciej")
sayer.say()
Export cell
Instead of going to the terminal to export our notebooks with nbdev_build_lib we can execute the command from any cell with
#hide
from nbdev.export import notebook2script
notebook2script()
from nbdev.export import notebook2script
notebook2script()
Run tests
We can also run all the tests in all notebooks in parallel from the terminal with nbdev_test_nbs. If something goes wrong, we get a traceback to the errors. Be careful with what we #export!
$ nbdev_test_nbs
testing: /home/brequena/GitHub/nbdev_metatutorial/00_tutorial.ipynb
testing: /home/brequena/GitHub/nbdev_metatutorial/01_core.ipynb
testing: /home/brequena/GitHub/nbdev_metatutorial/index.ipynb
All tests are passing!
To prevent any issue with nbs that we are currently working on and are not finished yet, we can exclude them from the test by adding _ at the beginning of the name, e.g., _core.ipynb.
Local docs
We can see the documentation without having to push and checking the github page if we install jekyll to generate the docs locally. It can take a while to install. While following the installation guide, it is important to run sudo apt-get update and then sudo apt-get upgrade as well as gem update before doing gem install bundler or it might be that the bundler is outdated (version needs to be $>2$). I didn't fooken manage tho.
With jekyll installed, go to the docs directory and run bundle install. Then, run make docs_serve, which will launch a docs server on port 4000.
More functionalities
There are a lot more functionalities, such as setting up requirements (we already saw it), set up console scripts, upload to pypi, etc.